Easily Manage Your Travel Plans with Flexibility
With TravelPassport, you can easily add, edit, delete, and copy travel events to match your schedule.
Whether it's sightseeing, meals, hotels, or transportation—everything can be managed in one place using the event feature!
Even if your plans change or you want to duplicate a similar event, TravelPassport offers simple, flexible options to keep things organized.
This guide will walk you through how to register, edit, delete, and copy events—and share practical tips to make the most of each function.
How to Add a New Event
イThere are two ways to register an event:
- From an unassigned ticket file (with AI support)
- Manually from the event list screen using the "+" button
This article focuses on the manual method via the event list screen.
To learn how to automatically generate events using AI, check out:
“How to Automatically Create Events in TravelPassport from Imported Email PDFs with AI”
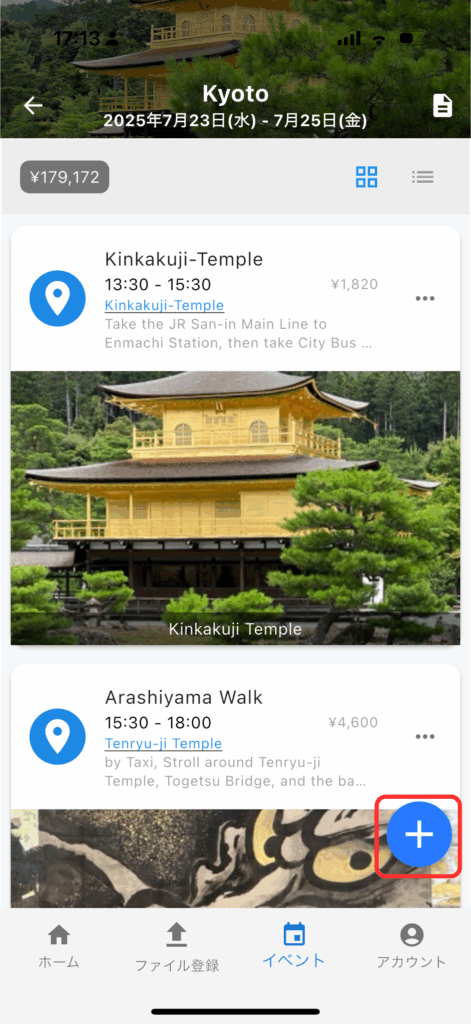
In Tile View:
Tap the "+" button in the bottom right corner.
You’ll be taken to the event creation screen (See “02 - Event Field Breakdown” for details)
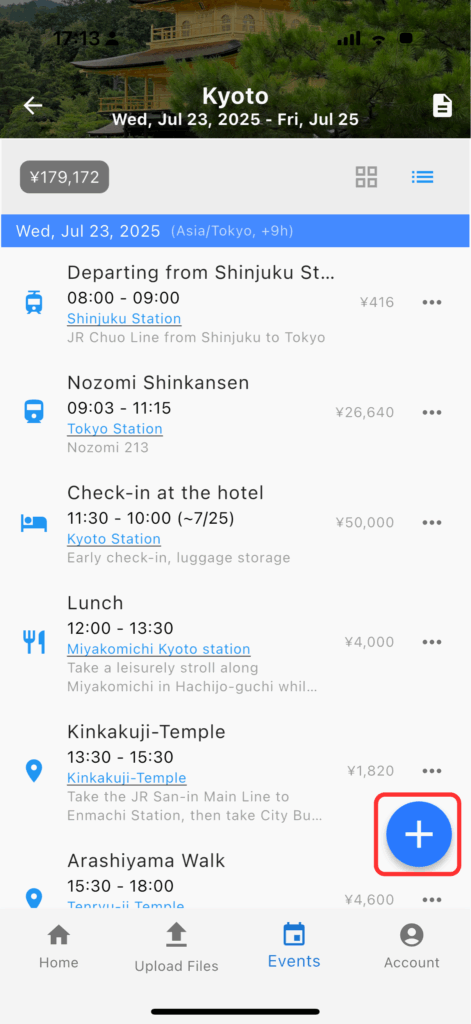
In List View:
Tap the "+" button in the bottom right corner.
You’ll be taken to the event creation screen (See “02 - Event Field Breakdown” for details)
Breakdown of Event Entry Fields
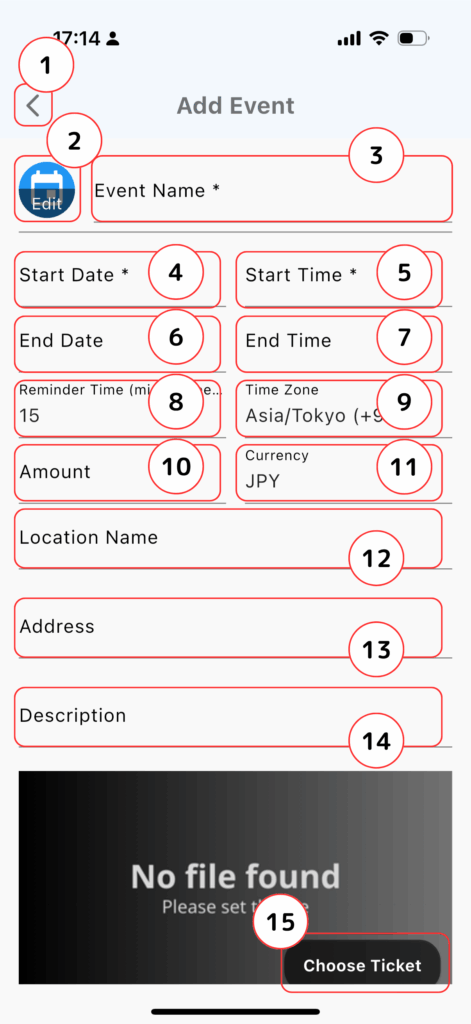
- Back Button
- Returns you to the event list screen.
- Icon
- Tap “Edit” to choose from 30 icons that match the event type for easy visual sorting.
- Title (Required)
- わかりやすいイベント名を入力してください。(例:朝食、チェックイン、観光 など)
- Start Date (Required)
- Select the start date of the event. Be mindful of the time zone.
- Start Time (Required)
- Select the start time of the event. Match the local time zone.
- End Date
- Set a date later than the start date.
- End Time
- Set a time later than the start time.
- Reminder Times (Minutes Before) (Required)
- Choose from 0 to 240 minutes in advance. Select “None” for no reminder.
- Time Zone (Required)
- Defaults to your current location. For international trips, set the event's local time zone.
- Cost
- Enter the estimated cost of the event.
- Currency (Required)
- Defaults to your home currency. You can change to the local currency as needed.
- If the selected currency differs from your home currency, the exchange rate input field will appear. (See “03 - Setting Exchange Rates” for details)
- Location
- Used for Google Maps search and display. Enter the place name.
- Address
- Improve Google Maps accuracy by entering the full address.
- Notes
- Add any other details or comments.
- Choose Tickets
- Choose a saved ticket file to link with this event. You can view or change the ticket at any time.
- For more information, see: “04 - Selecting a Ticket”
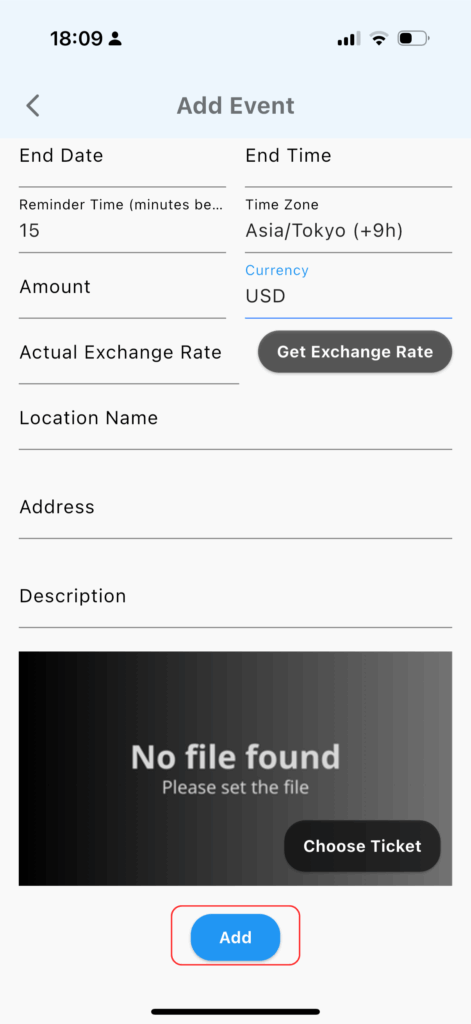
Once all necessary fields are filled out, tap Add to save your event.
Setting Exchange Rates
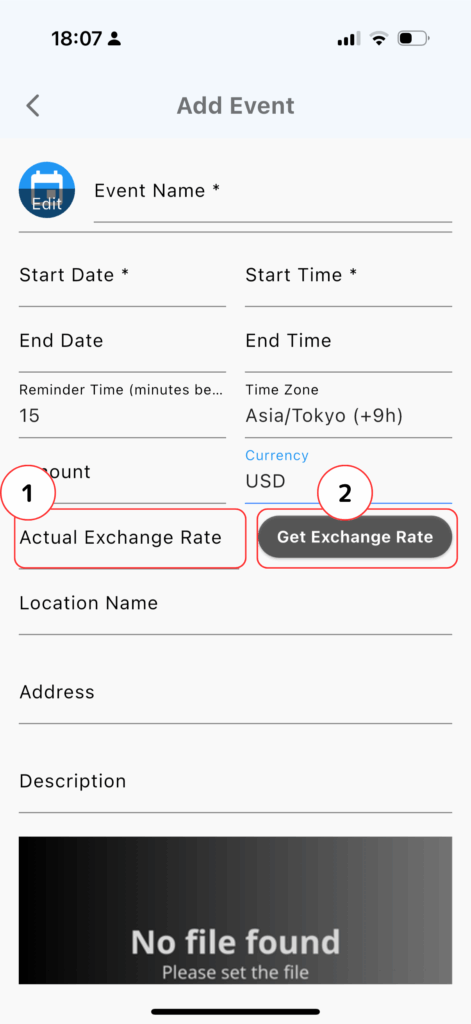
- Exchange Rate
- If you selected a foreign currency, enter the current exchange rate to convert costs accurately.
- Get Latest Rate
- Tap the “Get Latest Rate” button to fetch the real-time rate for your currency.
- Free Plan: Up to 5 times per month (resets monthly)
- Premium Plan: Unlimited access
- Tap the “Get Latest Rate” button to fetch the real-time rate for your currency.
Selecting a Ticket
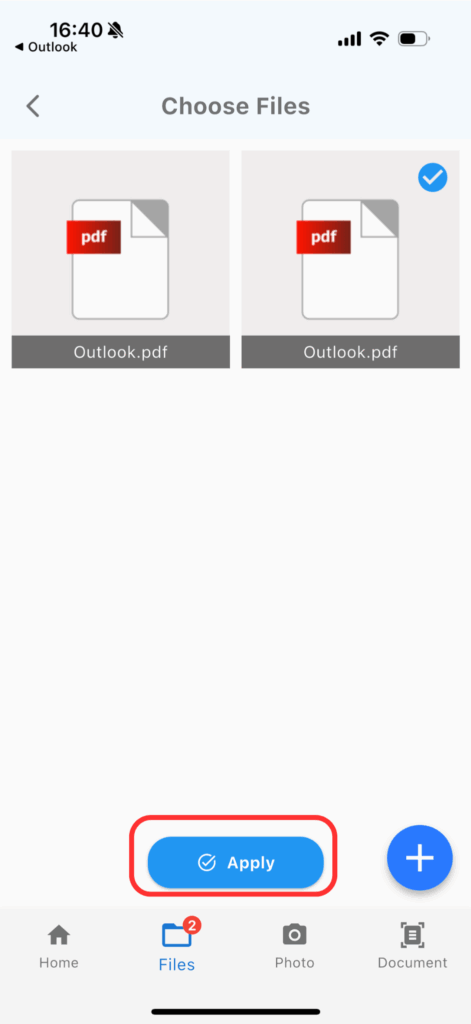
From the file list, choose a ticket and tap Apply.
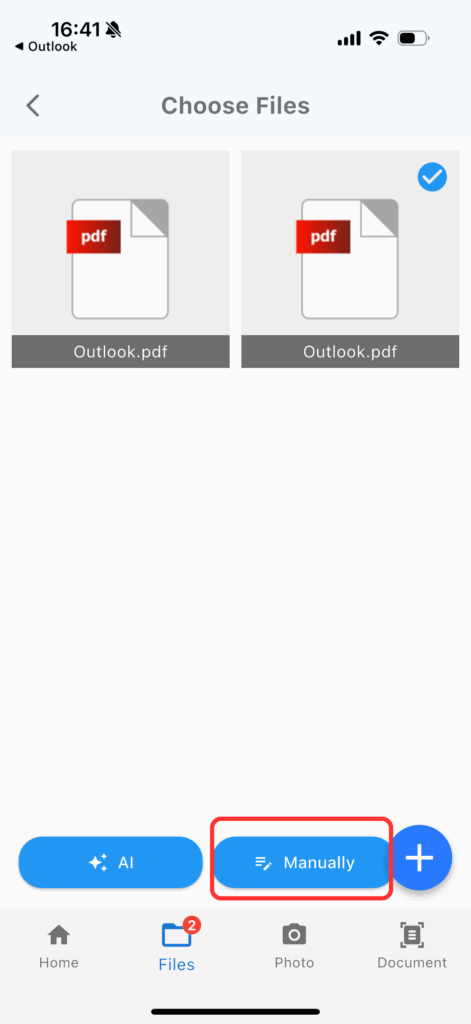
There are two ways to register a ticket:
- Manual Entry: Tap “Register Manually”
- AI Entry: Refer to “How to Automatically Create Events in TravelPassport from Imported Email PDFs with AI”
How to Edit or Copy Events
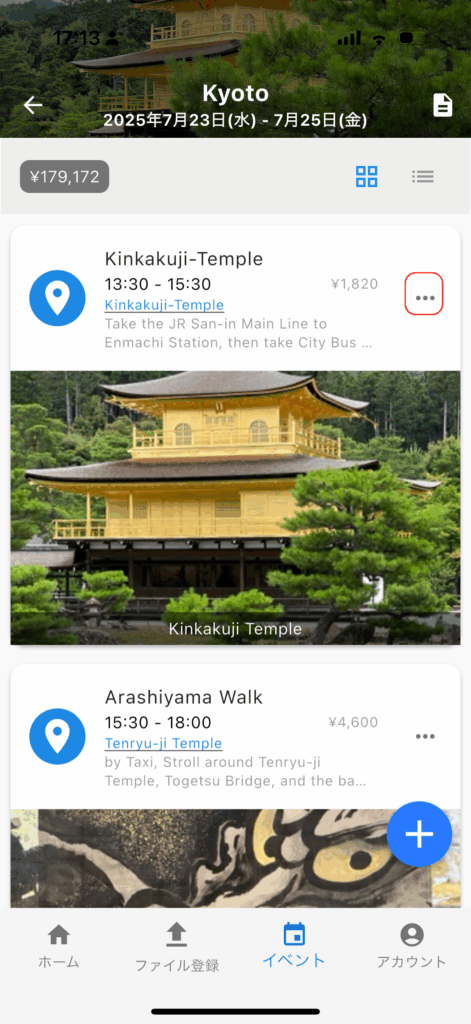
In Tile View
Tap the “…” menu on the top-right of the event.
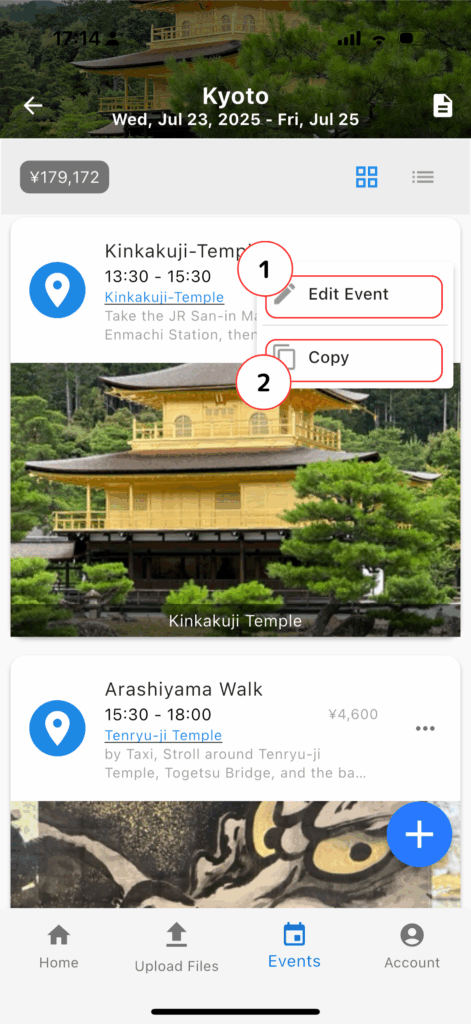
In Tile View
- Edit Event
- Takes you to the event editing screen.
- Copy
- Duplicates the event.
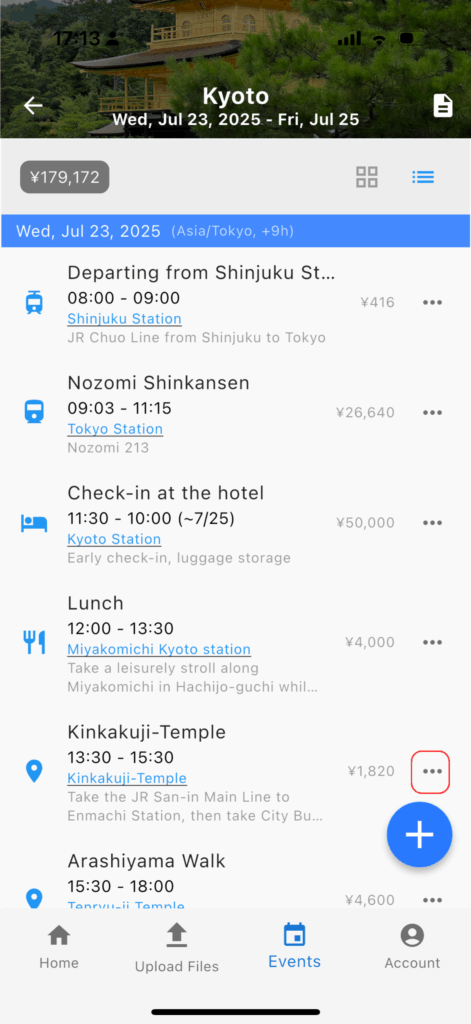
In List View
Tap the “…” menu on the top-right of the event.
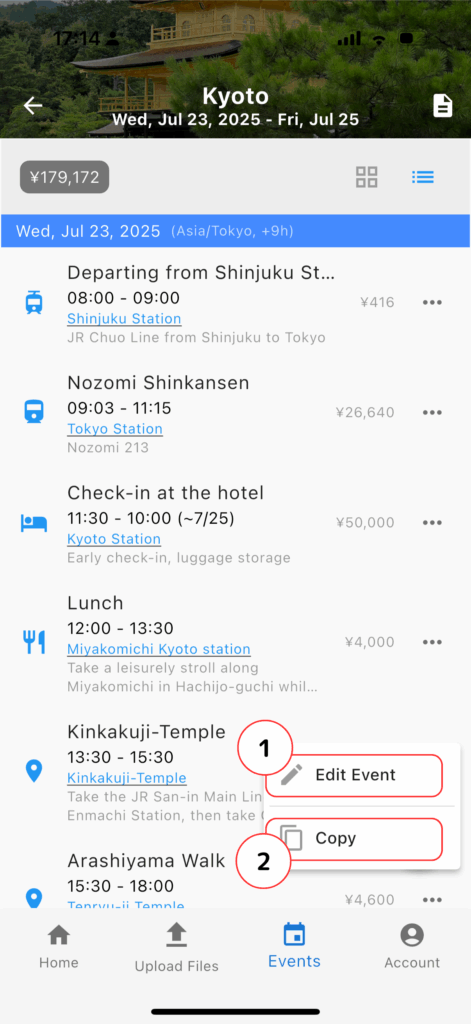
In List View
- Edit Event
- Takes you to the event editing screen.
- Copy
- Duplicates the event.
How to Edit or Delete an Event
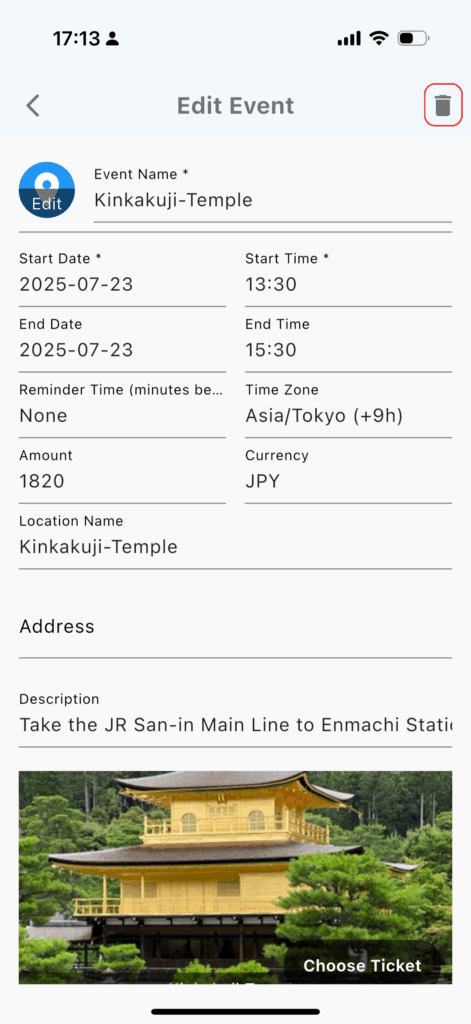
The fields in the Edit Event screen are the same as when creating a new event.
See “02 - Event Field Breakdown” for more information.
To delete an event, tap the trash icon in the top-right corner of the edit screen, then confirm by tapping OK.
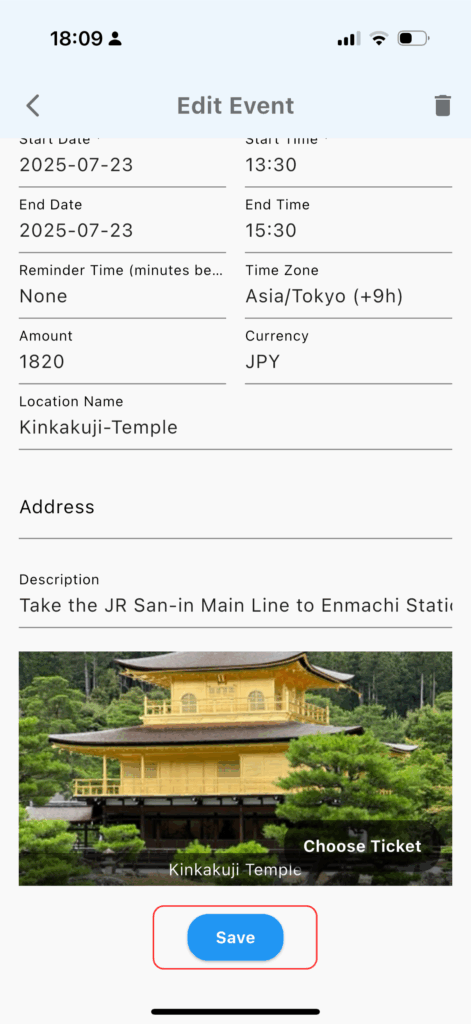
After editing, be sure to tap Save Changes to keep your updates.
By mastering the add, edit, delete, and copy functions in TravelPassport, you can easily stay on top of your travel plans—even as they change.
You don’t need to fill out every field.
Just enter what matters to your specific trip and keep your schedule organized and flexible.
