For those who want to efficiently manage their travel plans and records, sharing and backing up data is very important.
With TravelPassport, you can easily export (share) your travel data with just one tap, or import data from other devices or users.
For example, you can share travel data with colleagues or supervisors during business trips, or share it in advance with family members for family vacations. This makes checking itineraries and preparing for the trip smoother and more convenient.
Additionally, since you can choose who to share each trip with, you can flexibly share data according to the purpose—whether it’s a business trip, family trip, or a trip with friends.
This page explains the basic methods and key points for sharing, backing up, restoring, and importing data, using actual screenshots for clarity.
Please make use of these features for device changes, using multiple devices, or safely storing important travel records.
Exporting Travel Data
Tap the options menu for the trip you want to share or export.
Tap the “Share” button in the options menu to display the dialog for sharing or saving the file.
Screenshots are from iOS. On Android, the icons used for sharing may differ.
Sharing Travel Data
You can share or save travel data in various ways.
- To share by email, tap a mail app such as Mail, Gmail, or Outlook.
- To share via social media, tap the SNS app.
- To save locally, tap “Save to Files.”
- To save to a cloud drive, tap a cloud drive app such as OneDrive or Google Drive.
Now your travel data file has been exported and saved for sharing. Next, let’s try importing travel data.
The exported file has the extension “.tps”.
To make the process easier from the second time onward, tap “Edit” at the top right of the app list displayed under “More,” and add TravelPassport to your frequently used items.
Screenshots are from iOS. The basic operation is the same on Android, but the screens may look slightly different.
Importing Travel Data from Local Files
Tap the file registration button to display the file list screen.
Tap the “+” button on the file list screen to open the file import menu.
From the file import menu, tap “Add File.”
Select the previously saved TravelPassport travel data file (.tps).
Proceed to import in “05. Travel Data File.”
Importing Travel Data from Email or Social Media
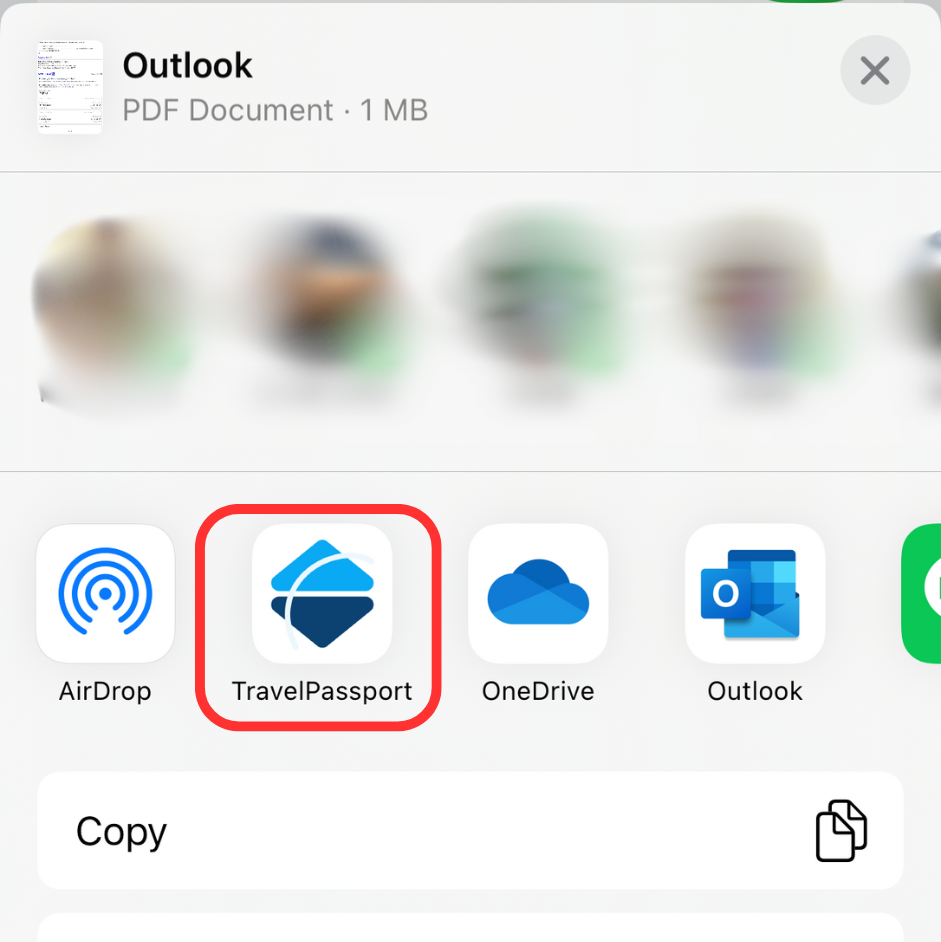
Tap the share button in your SNS or mail app (this differs between iOS and Android), then select TravelPassport from the list of apps shown as sharing destinations.
If you don’t see it, tap “More” at the far right of the list to display all apps, then select “TravelPassport.”
To make the process easier from the second time onward, tap “Edit” at the top right of the app list displayed under “More,” and add TravelPassport to your frequently used items.
Tap “Send.” There is no need to fill in the memo field.
Importing Travel Data Files
Once the “.tps” file has been successfully linked to TravelPassport, an import dialog will appear—tap “Import.”
Congratulations! If the import success dialog appears, the import is complete. Tap “OK” to check the import result.
How was it?
By using TravelPassport’s data sharing and import features, you can manage your travel plans and memories more safely and conveniently.
We will continue to introduce other useful features and usage tips in this user guide, so please check back for updates!