When planning a trip, you may receive various confirmation emails for flights, hotels, events, and tours. By importing these emails into TravelPassport, you can keep all your important travel information in one place, making it easily accessible whenever you need it. This guide explains how to save your emails as PDF files and import them into TravelPassport for seamless travel management.
This guide is for iOS (iPhone and iPad) users. The steps may vary slightly depending on the email app you use, so please follow the instructions that match your app. In this guide, we introduce examples using the iOS default “Mail” app, “Gmail,” and “Microsoft Outlook.”
If you are an Android user, please refer to the [Android User Guide].
Importing Emails from the Mail App
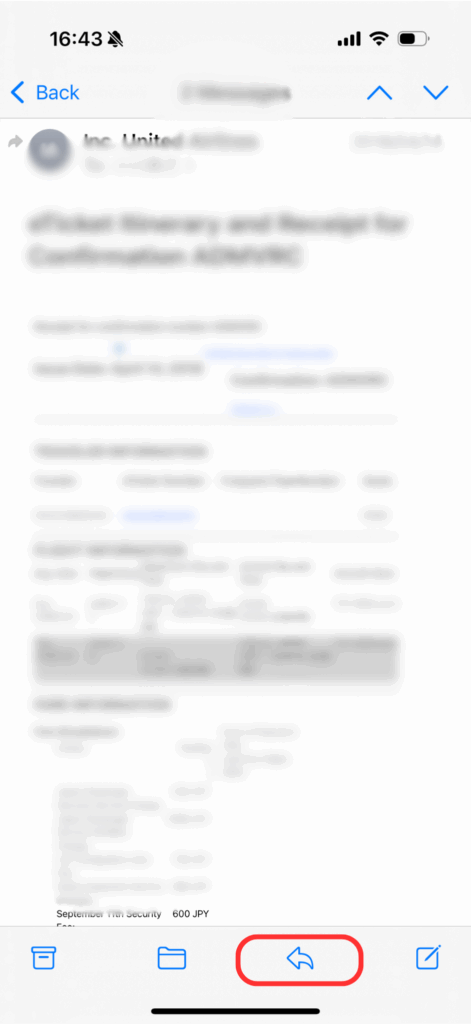
Open the email you want to import into TravelPassport (such as a travel, event, or reservation email) in the iPhone’s default “Mail” app. Tap the “arrow” button at the bottom of the screen.
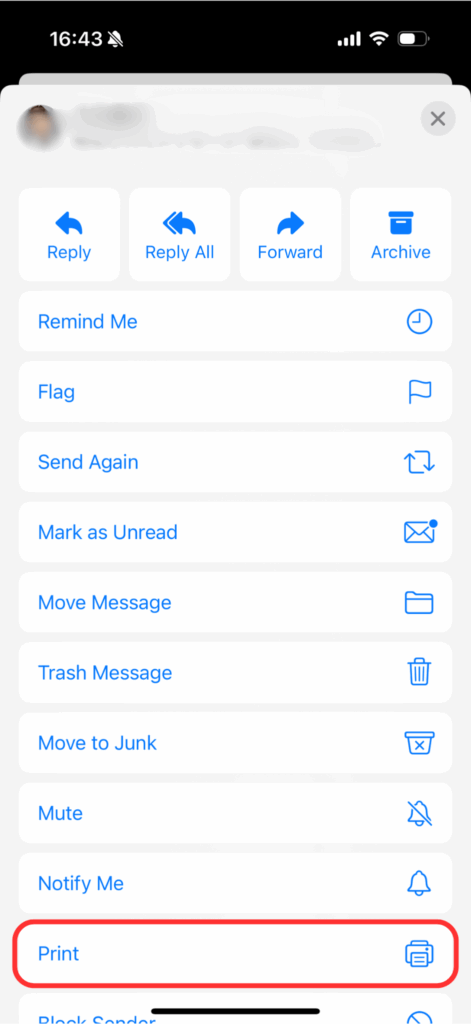
From the menu that appears, tap “Print.”
Then, proceed to “Step 4: Import Data to TravelPassport from the Print Screen.”
Importing Emails from Gmail
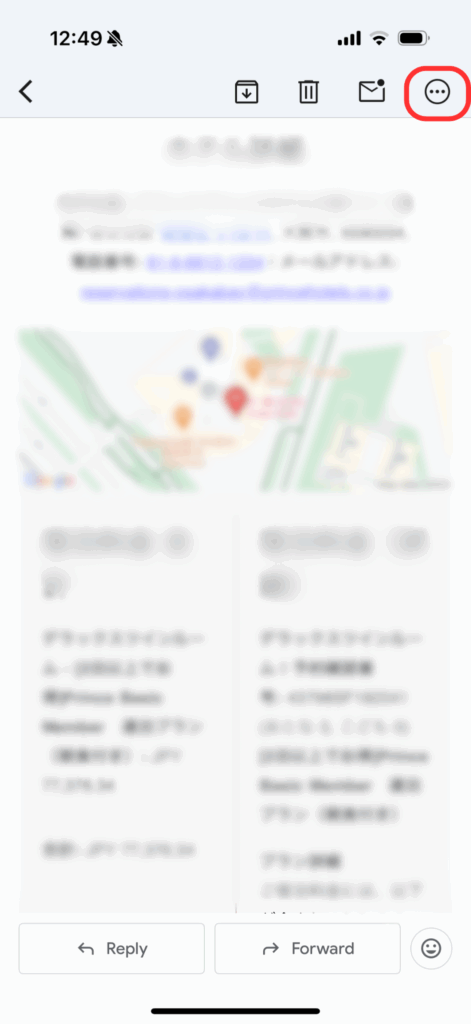
In the Gmail app, open the email you want to import into TravelPassport (such as a travel, event, or reservation email), and tap the “…” button in the upper right corner.
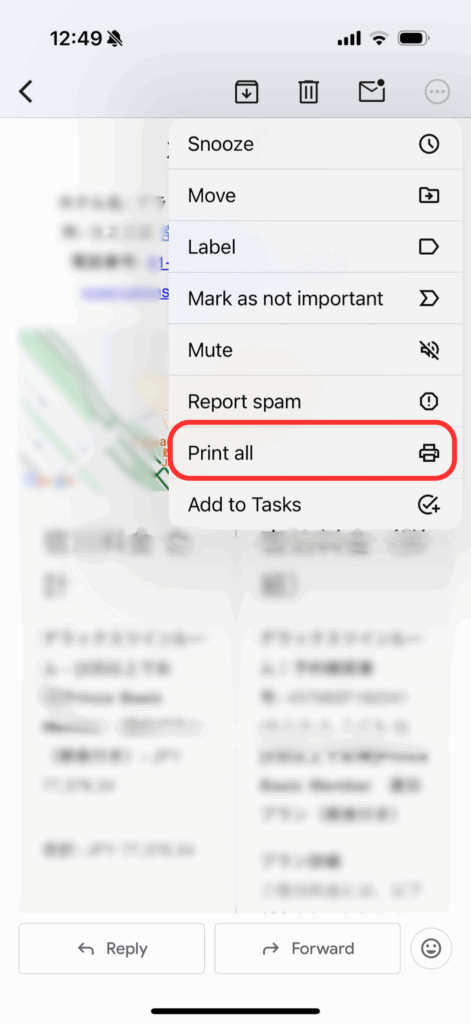
From the menu that appears, tap “Print all.”
Then, proceed to “Step 4: Import Data to TravelPassport from the Print Screen.”
Importing Emails from Microsoft Outlook
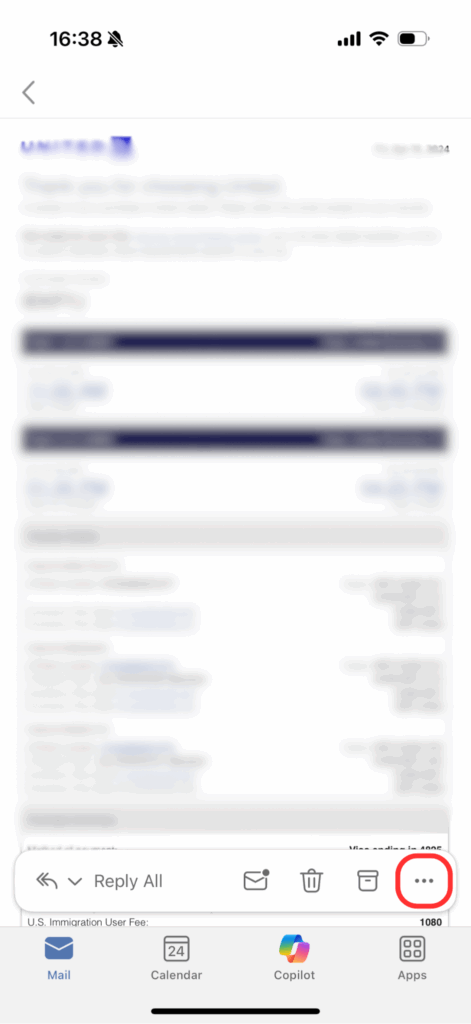
In the Microsoft Outlook app on your iPhone, open the email you want to import into TravelPassport, and tap the “…” button at the bottom of the screen.
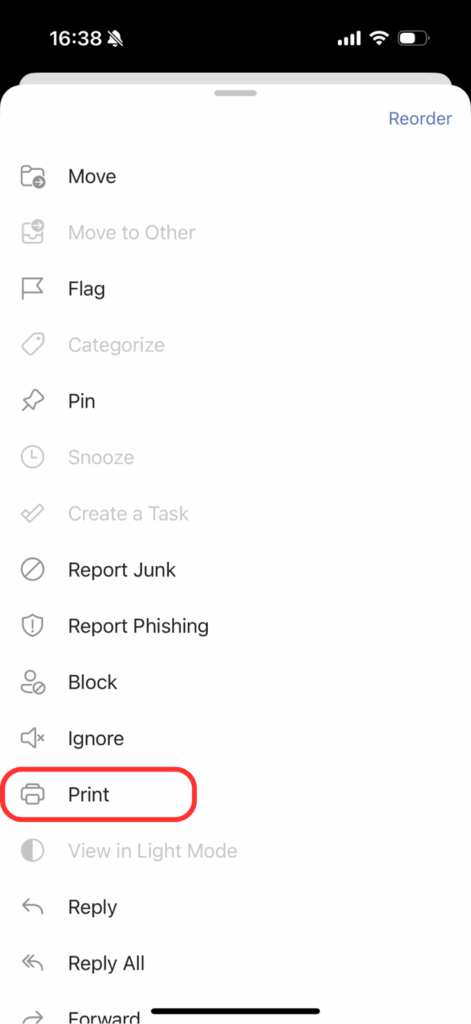
From the menu that appears, tap “Print.”
Then, proceed to “Step 4: Import Data to TravelPassport from the Print Screen.”
Import Data to TravelPassport from the Print Screen
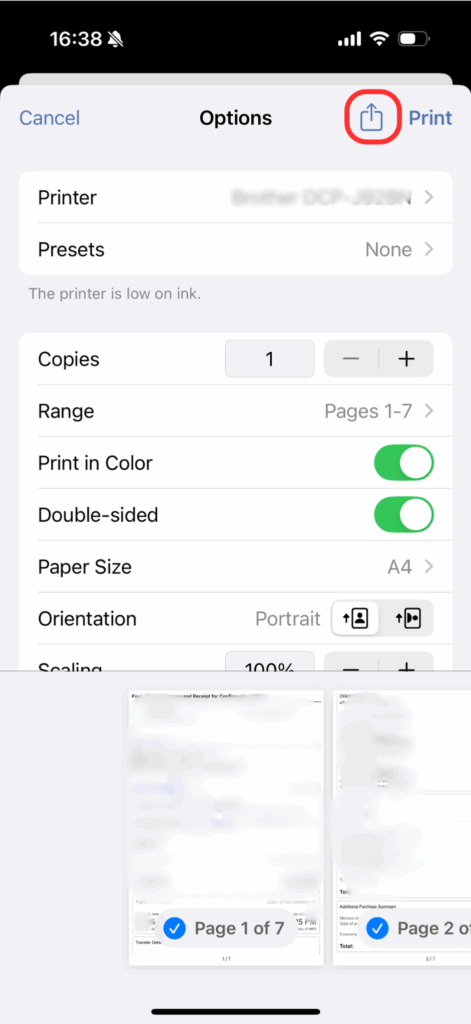
On the print screen that appears, tap the “Share” button.
At this point, the email data will be converted to a PDF.
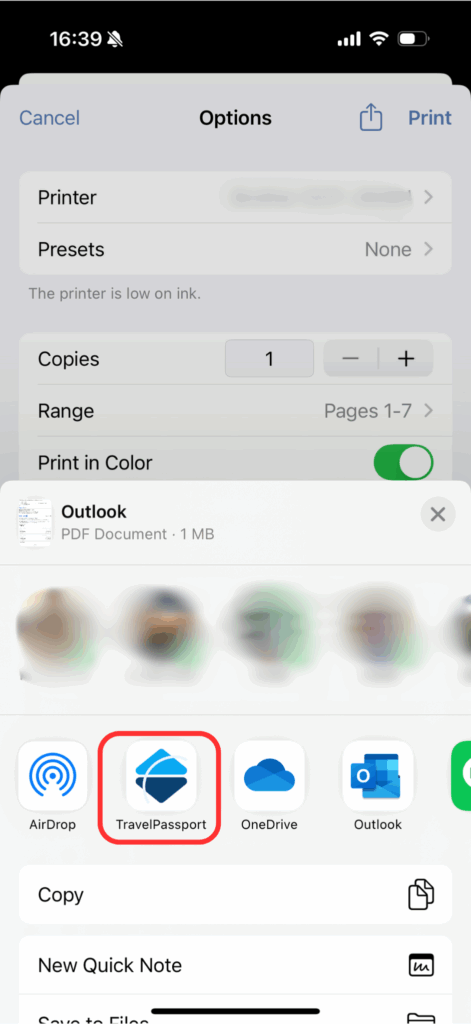
Find and tap TravelPassport from the list of sharing apps. If you don’t see it, tap “More” at the far right of the app list to display all available apps, then select “TravelPassport” from there.
To make sharing to TravelPassport easier next time, tap “Edit” in the upper right corner of the app list (displayed after tapping “More”) and add TravelPassport to your favorites.

Tap “Send.” You do not need to enter anything in the memo field.
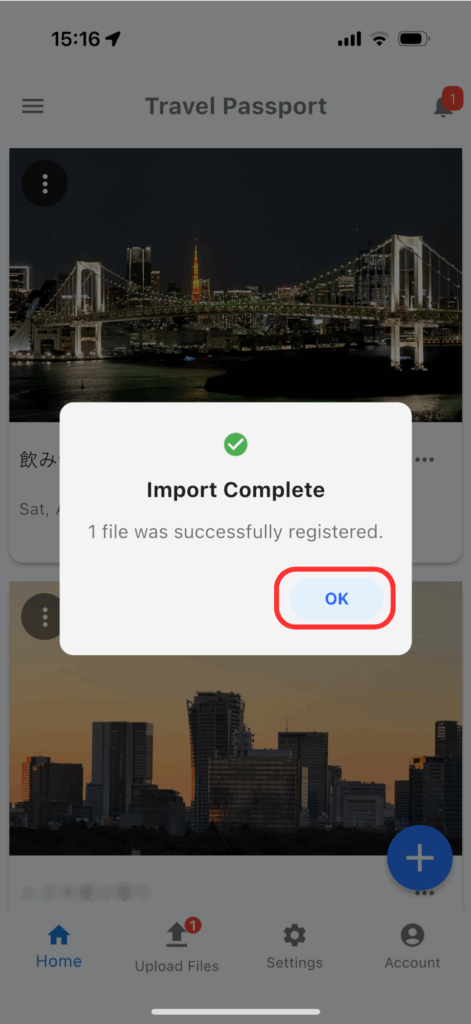
TravelPassport will launch, and a “Import Successful” dialog will appear. Tap “OK” to close it.
Congratulations! You have successfully imported your email into TravelPassport.
Now you can effortlessly organize all your essential reservation details in TravelPassport. With everything stored in one app, you’ll have peace of mind knowing you can quickly retrieve any necessary information while traveling. Make the most of this method to enjoy a smoother, more organized travel experience!
